Believe it or not I got almost all of my Christmas gifts done on time, with a bit of Christmas gift card cheating. Of course the holidays are so packed with fun I had no time to write about the adventures in crafting. I have started learning knitting (my crochet hooks look at me as a trader now), and my resolution is to learn how to spin my own yarn, and make my life a bit more creative. (Also yoga, be more tolerant person, and love love love)
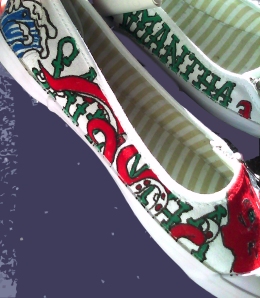
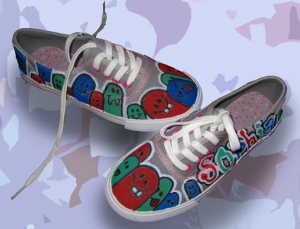
Anyhow, one of the presents I forgot to tell you wonderful blog readers about is the gift I gave to my littlest niece Hanna. Hanna is very small. She is so small I figured that if I was talented enough to draw in a small space, she would only be able to enjoy her custom shoes for about a week until her feet incredible hulk their way out of them. So what to do for my little one?
CLOUD MOBILE A LA PORTLAND! All you need for this project is:
Felt (8.5 x 11 sheets 4 for a dollar) in red, black, white (x2), and blue $1.25
Needle and thread or sewing machine
String of beads ( 50 cents at a second-hand store)
fabric paint (1.99 big bottle)
Stuffing (3.50 a bag)
Steps: 1. Stick the two white pieces of felt together and cut into a shape of a cloud. You can do this free-handed as well. 2. fold the red felt in half and make 2 hearts big enough to fit on the face of the cloud. 3. Cut a small tongue (kind of like a heart with a rounded edge at the bottom of it instead of a point) out of the red felt. 4. Sew the tongue to the black felt and cut the felt into a U shape. Also cut off two of the corners for the winking eyes. 5. At this time I would paint the letters of the name you want to have hanging from it on the blue felt and let dry.
6. Here is the easy but tricky part… look at your white felt sandwich. you want your face to go in between the white felt so sew the pieces in and then sew your felt on the top, left, and right side ONLY. Set your cloud to the side.
When you turn your cloud inside out it should look like the photo above. 7. Cut the string of beads however long you would like them to be and secure them to the inside of the cloud. 8. Cut your “hopefully” now dry raindrops around the name and secure them to the other side of the string of beads. 9. Stuff the cloud and sew the open end. It should look like this:
YEAY TO HAPPY CLOUDS IN THE SKY POOPING RAIN! Oh and if you don’t want to make one… I can! Just email me or visit my shop and I can make it happen for $15. Thanks!


 So what does every man need in the winter? No matter how hairy that man may be, even the furriest of mammals could use a hat and scarf ! First pick your manly colors (grey, black, dark reds, and blues are my go to man colors, as well as earth tones) I apologize in advance for my gender specific color assignments, but when it comes down to it, my brother is a picky picky man! Find your crochet hook and get to crocheting. I used a single stitch for the hats below. If you need help on how to crochet, you can refer to the wonderful world of You tube for tutorials and color changing for striped is easy, just knot the new yarn onto the one you are finished working with.


